
7 Tips For Growing Nutrient Dense Microgreens in Containers

Lynn Gillespie is an organic farmer and gardening educator at TheLivingFarm.org. She specializes in teaching High Performance Garden systems and is the author of the High Performance Garden eBook and the creator of the Abundance Garden and the Leafy Greens Container Garden courses. Lynn and her family have been Paleo for 4 years and you can also find her at her blog, PaleoGardening.com
Wouldn’t it be nice to eat high quality greens in your salads all year long?
Well, with microgreens, you can do just that!
What are microgreens?
Microgreens are immature plant starts that are eaten raw. They are a great way to boost nutrition and enjoy a fresh salad for dinner!
While you can find microgreens in the store, they often cost upwards of $20 per pound and typically, only a few varieties are available. However, you can grown your own at home for a few pennies per serving, and best of all, they can be ready to eat from your container garden in as little as 14 days.
Microgreens are a forgiving plant to grow, making them super easy for beginning gardeners. Growing them can also be a fun project to do with the kids – I’ve found that there is no better way to inspire your child to eat their vegetables than when they grow them themselves.
Growing microgreens is different to growing sprouts
You will have most likely heard of growing sprouts in jars and might be wondering how microgreens are any different. So, before I get to the tips, let me answer this quick question.
First, microgreens take more than just a few days to grow.
Second, microgreens are grown in soil, not just water.
And third, microgreens have no seeds attached to them when you eat them and they are filled with chlorophyll unlike some sprouts that are grown in the dark.
7 Tips For Growing Microgreens in Containers
There are so many different varieties and colors of microgreens you can experiment with so I hope you’re ready to start growing your very own delicious nutritious greens at home.
Below are 7 tips to get you started.
1. Choose Shallow Containers with Drain Holes
Microgreens prefer shallow containers no more than 2 inches deep, and they must have drain holes. I use greenhouse trays for my microgreens. You can easily find a tray this size at your local gardening store and maybe even around your house.
2. Create A High Quality Soil
To get the highest nutrient density from your microgreens you will need to use a high quality organic soil. I don’t like to buy the commercially made mixes as they usually have too much peatmoss, which will cause the seeds to rot if the soil is too wet. For the best results I have always used my family’s secret seedling recipe. We have used this for 4 generations now and it is still working great even to this day.
Are you ready for the recipe?
Use the same container to measure out the quantities of each ingredient to make sure that your measurements are correct. Use 3 parts peat moss, 1 part sand, and 1 part perlite. Add enough water to make the soil moist and you are ready to plant your microgreens. The plants don’t need any nutrients added. Everything they need is stored in the seed until the first adult leaves reach full size. All you need is this soil mix to grow your microgreens!
3. Buy Untreated Microgreen Seeds
When you are buying seeds choose organic whenever you can and never get treated seeds. I like to get my microgreens seeds from Johnny’s Selected Seeds.
When you are growing organic microgreen seeds you can trust that the seeds are safe and have not been exposed to any chemicals.
For my organic farm I have trusted Johnny’s Selected seeds for years. A great seed packet to begin growing is their Mild Micro Mix or their Spicy Micro Mix. There are lots of colors and different plants in each mix so you get a variety of flavors and nutrients. If you are feeling adventurous, then buy the Shungiku seeds, these are amazing oriental greens that make great microgreens. Another great microgreen option to try is the field pea seeds. I love the micro peas, they taste just like peas but in leafy form. These are great in salads, stir fries and they come right out of your microgreen garden.
4. Grow Your Microgreens in a Warm Place
Now that we have our seeds, containers and soil, it is time to plant!
Fill your container to within ½ inch of the rim of your container with soil. Sprinkle the seeds on the surface so they are dense. Approximately 10-12 seeds per sq. inch for small seeds and 6-8 seeds per sq. inch for larger seeds like peas.
Cover the seeds with a light dusting of the seedling soil mix. Then set the container in a shallow bucket of water and let the water soak up from the bottom of your container until the soil is moist. Lift the container from the bucket and let it drain.
Once it has drained, cover the container with a piece of plastic wrap with a few holes punched into it. Covering your container helps to contain the moisture for your microgreens. Then place in a warm place around 70 deg. F but not in direct sunlight until the seeds germinate. I like to put mine on top of the fridge which is usually a warm place. Check every day to make sure they are moist.
5. Keep Your Microgreens Moist, Light, and Warm
It usually takes 5-7 days for your seeds to germinate. Once the seeds have germinated rewater the container from the bottom and set it in a sunny location. This could be in a window or protected place outdoors, out of the wind. You can also grow them under a florescent light. It will take the seeds 10-20 days to reach the size you want for harvesting. While they grow make sure to keep them moist, light, and warm.
6. Harvest Once They Reach 2-3 Inches High
It is time to harvest the plants once they reach 2-3 inches high and have their first set of adult leaves. The first leaves out are the baby leaves and they are more round. The second set of leaves are the adult leaves they have more distinct shapes. To harvest take a pair of scissors and cut the plants off at the soil level. Wash the plants, let them air dry until almost completely dry then store them in a plastic bag with a paper towel in it. They should store for up to a week but I would eat them sooner, because they are so yummy!
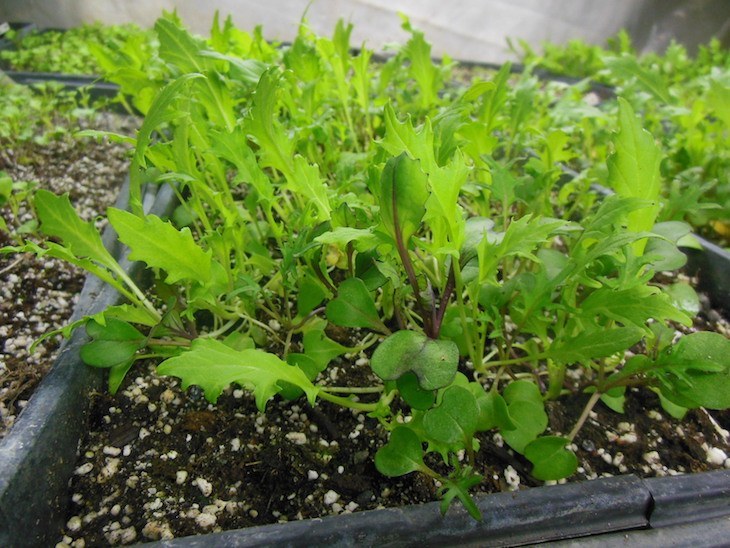
Ready to harvest microgreens!
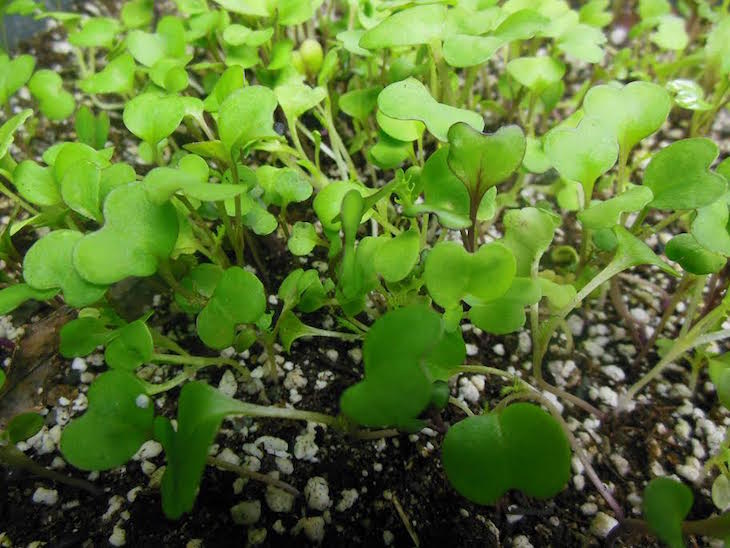
A microgreen tray with it’s baby leaves. It is not ready for harvest until the second set of leaves appear.
7. Keep A Continuous Supply of Microgreens
Once you harvest your plants you will recycle the soil and the stubs back into your compost and start over. If you would like a continuous supply of microgreens, then plant a container every week. Once you get good at a few varieties of microgreens then you can branch out to grow more exotic greens. This is a really fun way to grow your own nutrients!
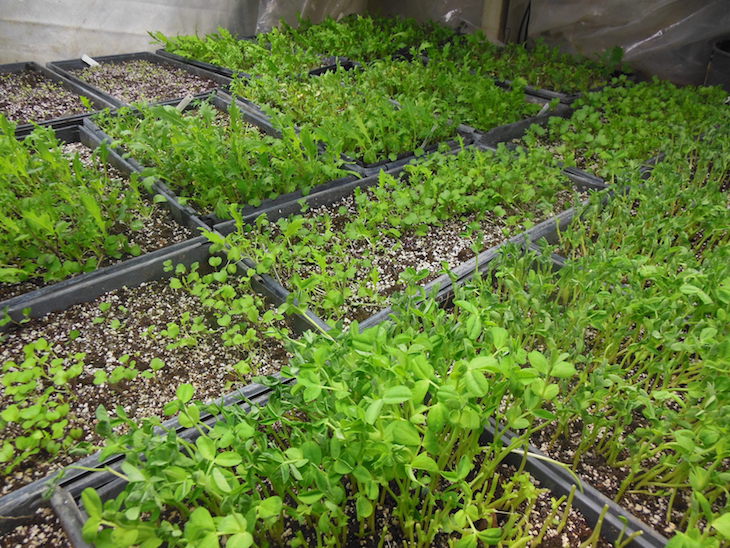
Planting in succession with your trays will allow for microgreens for weeks to come! My farm’s CSA loves their microgreens to keep on coming in the winter.
Growing microgreens is a great way to help your grocery budget, add nutrition and flavor to your meals and to have something fun to grow. They are a great way to grow something fresh in the winter when most of our gardens are under the snow. You will be amazed to discover how much you can grow despite the cold winter months. I encourage you to get the supplies and get started today!
If you are feeling inspired to grow more than just microgreens, and you want to grow all of the greens for your salads, you can learn more about growing delicious nutrient dense produce at the High Performance Garden Community. This free online gardening community has plenty of training videos and articles to help you as you grow the easiest and most productive gardens ever!
Until next time, may your garden be easy, fun, productive and always organic!
Lynn